Create a Cabinet
Organizing your Data
If you use Dragon1 and enter data, the data is stored in a repository. Because over time, the amount of data you enter will grow significantly, Dragon1 provides you with a smart way of organizing your repository so that you can always find data back and keep it manageable.
Dragon1 uses the concept of Cabinets, Dossiers, and Folders to organize (partition) the data.
When starting to organize, the first step is to create a cabinet, which is the highest partitioning level in the repository. You can create as many cabinets as needed in the repository.
To better understand the concept of a Cabinet, Dossiers, and Folders, you have to imagine a room with a large closet consisting of an endless number of drawers. The cabinet can be compared to an imaginary room with a large closet. The Dossier can be compared to one of the drawers, and a Folder can be compared to one of the items inside the drawer.
Within Dragon1, there is a best practice on setting up a cabinet, dossier, and folder structure.
How to Create a Cabinet?
A cabinet can be created in both the Architecture Repository and the Visual Designer.
This tutorial shows how to create a new Cabinet in the Architecture Repository.
- Log in.
- Click on Architecture Repository in the left sidebar.
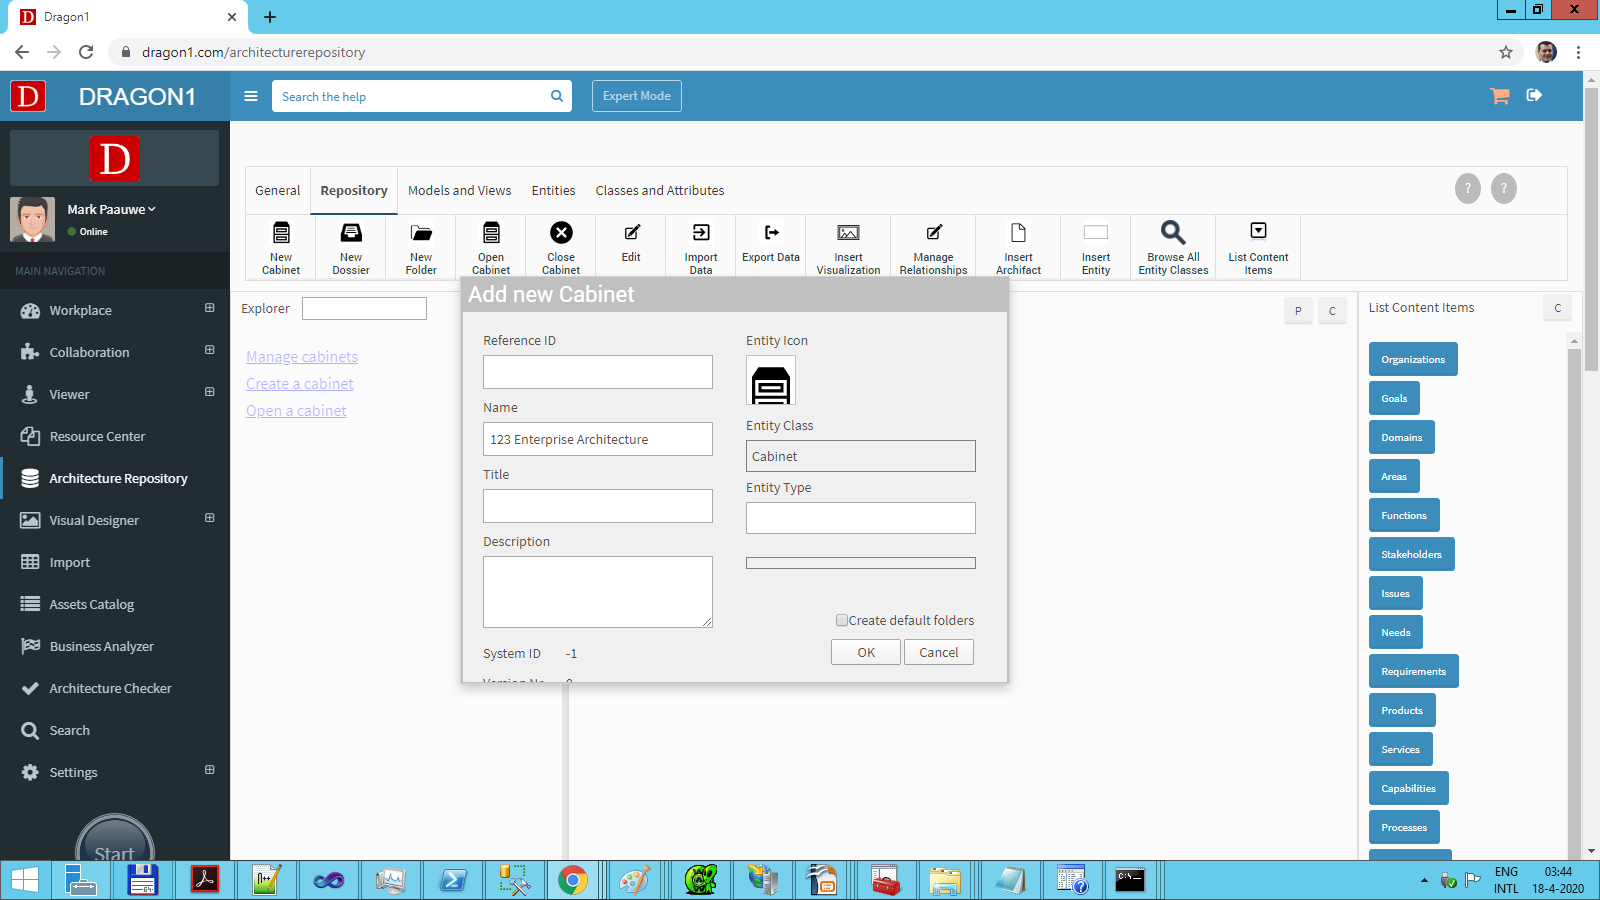
The Architecture Repository opens and shows an empty working screen. Showing the button bar for 'Repository'. - Click on 'New Cabinet' in the button bar.
- In the pop-up dialog, fill in the Name and Title fields for the new Cabinet.
- Press the 'OK button'.
- A notification appears, indicating the Cabinet has been created.
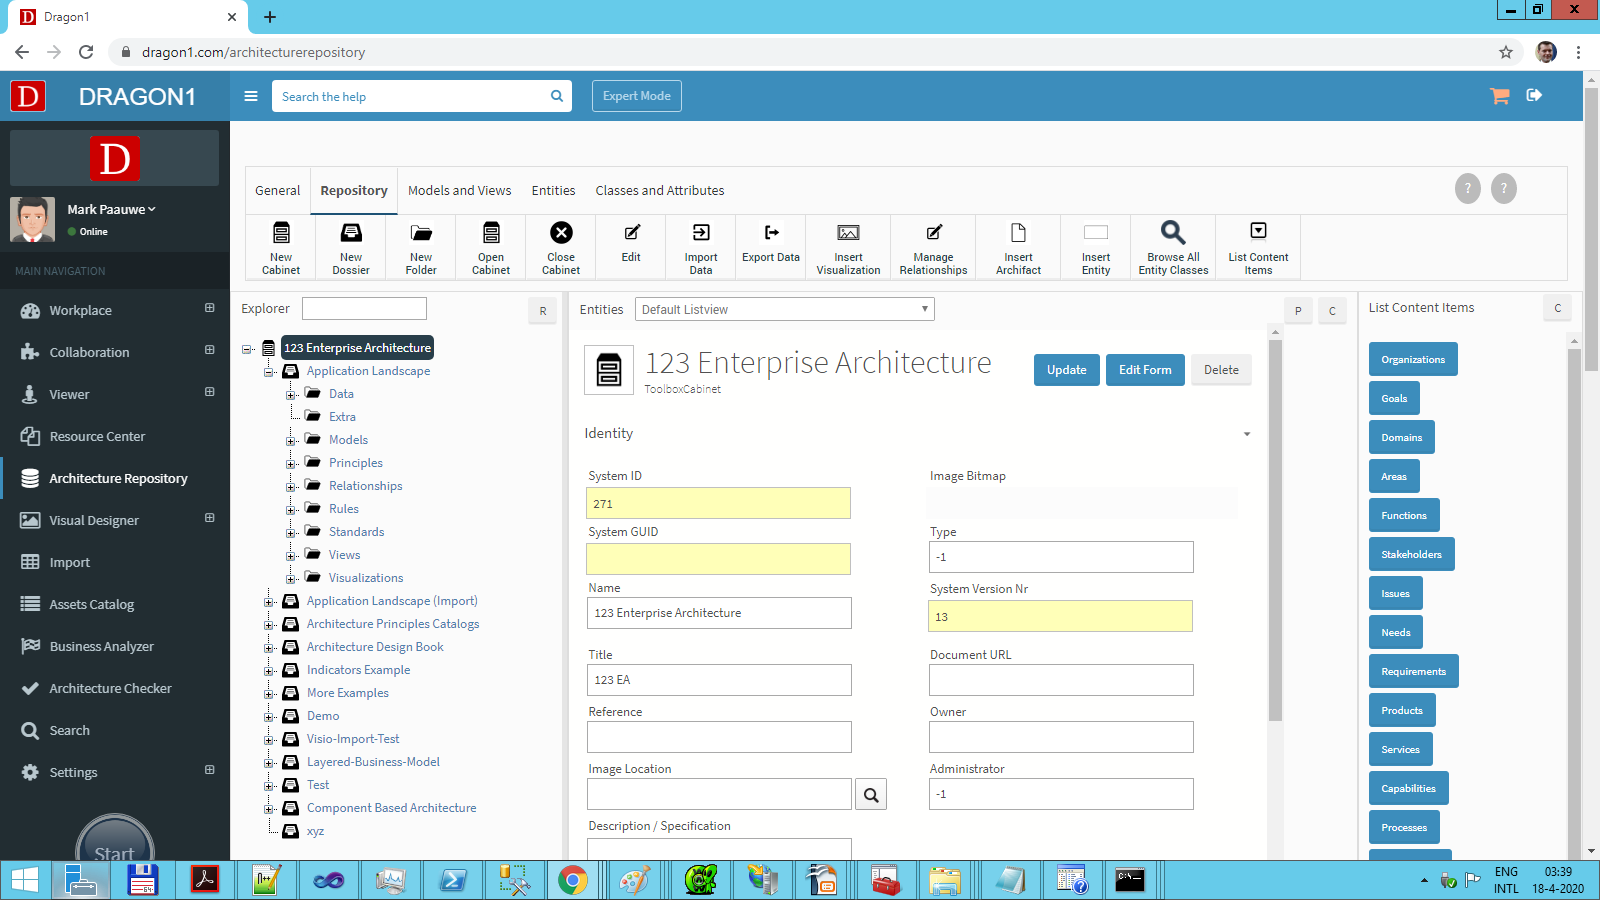
- The new Cabinet is visible in the Explorer tree view.
In case another cabinet was shown in the Explorer tree view, that cabinet is closed automatically. Leaving the newly created Cabinet opened.


