How to Create an ArchiMate Business Functions Diagram

ArchiMate Tutorial

Do you want to create an ArchiMate Business Functions Diagram? Then read the following ArchiMate Tutorial.

In ArchiMate, viewpoints are defined as the place where you are looking from. A view is defined as what you see when looking from that viewpoint. In ArchiMate a view is specified with a viewpoint. For every defined viewpoint a meta-model is documented and an example view is provided.

On this page, we will show you how to create an ArchiMate Business Functions View, based on the ArchiMate Business Functions Viewpoint.

Step 1. Architecture Repository: Collect and Enter Data

dragon1 architecture repository

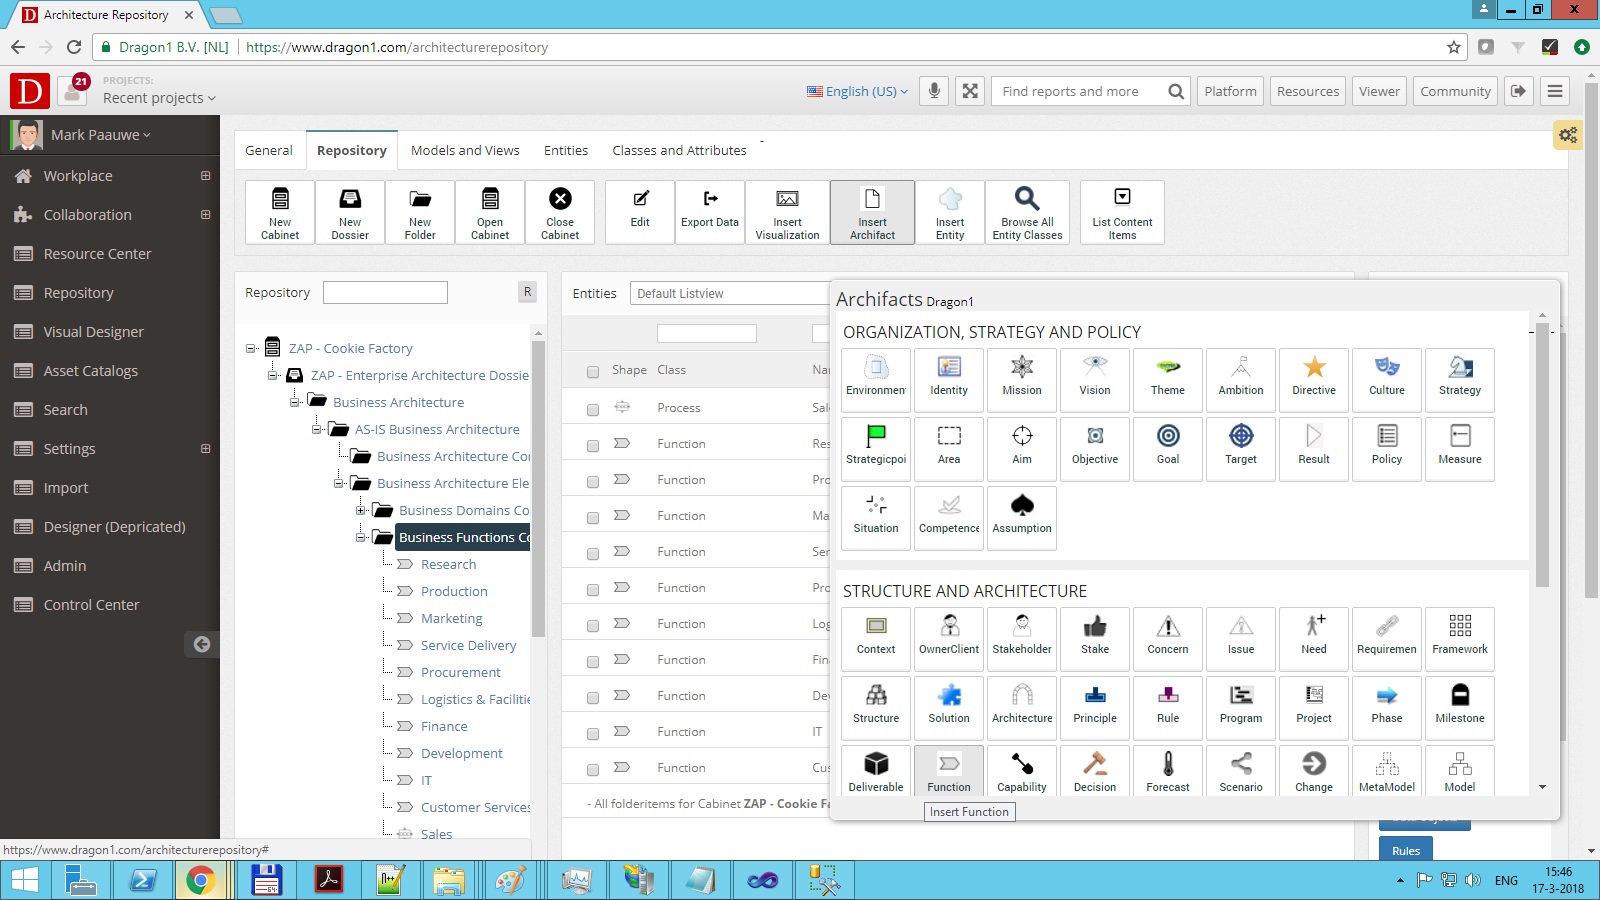
Screenshot of the Architecture Repository Web Application.

On the Dragon1 platform, you can use the Architecture Repository web application to enter data manually or to import the data automatically. There are 400+ default entity classes you can enter, from a product, process, or service to an application, database, network, server, or client.

Here you see a screenshot of the Architecture Repository where on the ArchiMate canvas the Business Functions are entered. You see a drop-down menu from which you can select an entity class to insert into folders. You can also select and enter Business Roles and Business Actors. These three entity classes are needed to create a complete ArchiMate Business View, compliant with the Viewpoint. At this point we have not chosen a metamodel, so we are not limited by entering or documenting whatever entity class we like.

The data you enter is stored 'logically' in a cabinet/dossier/folder structure that you can create and change to your likeness. You can enter, share, and hide folders and data with or from team members.

dragon1 new edit dialog

Screenshot of the New Edit Dialog.

Data is entered normally via the New/Edit dialog. If you click on an entity class in the drop-down menu that is visible in the screenshot above, the New Edit Dialog will appear and you can enter data and click ok. Then the data you have entered is placed in the database.

Overview of tasks to enter data in the Architecture Repository

  • Go to www.dragon1.com;
  • Log in;
  • Go to Architecture Repository web application;
  • Create a cabinet, dossier, and folders using the New/Edit dialog;
  • Insert Business Functions, Business Actors, and Business Roles using the New/Edit Dialog.

Step 2. Architecture Repository: Create a Model

dragon1 use tags in data list view

Screenshot of the Architecture Repository showing a model.

In the Architecture Repository, but also the Visual Designer, you can create or draw models compliant to metamodels. Creating a model is only a matter of relating entities with each other: create a relationship between two entities and you already have a model. You can create models and metamodels or alter existing ones.

Above you see a screenshot of the Architecture Repository with the model item in the tree view selected. The model (the relationships between entities, if any) is shown.

dragon1 use tags in data list view

Screenshot of the defined standard metamodel for the Architecture Business Functions Viewpoints.

This metamodel limits the entity classes we may use to create a model.

As you see we may use three different entityclasses to create a Business Functions View: Business Function, Business Role, and Business Actor.

dragon1 insert relationship dialog

Screenshot of the Insert Relationship Dialog.

Data is normally entered in the Architecture Repository via the Insert Relationship. On the menu bar, you just need to click the menu item and the dialog will appear.

Overview of tasks to create a model in the Architecture Repository

  • Select the folder where you want to place the model;
  • Click 'Insert Model'
  • Enter the name of the model in the New Edit dialog;
  • Select the folder of the model;
  • Click on 'Insert Relationship'
  • Enter the name of the relationship, select the two entities you want to relate with each other and select the type of relationship between the entities.

Step 3. Visual Designer: Create a Visualization Template

dragon1 visual designer

Screenshot of the ArchiMate Business Functions in the Visual Designer.

On Dragon1, you can draw visualizations in the Visual Designer like you are used to in PowerPoint or Visio. But you can also draw or insert Visual Items. these are data/shape-placeholders.

You just link the Visual Items to entity classes present in the data stream of a model to a visualization canvas and configure what shape in what pattern should be drawn on the canvas.

'Visual Items' is an innovative and unique visualization feature that simplifies the generation of visualizations. Also when the model data changes, you do not need to change the visualization template (a canvas with visual items).

Overview of tasks to create a visualization template in the Visual Designer

  • Click 'Insert Visualization' to create a canvas;
  • Select the Visualization in the tree view and click Edit;
  • Link in the dialog the visualization to the model or view and click OK;
  • Click 'Insert Visual Item' to insert a placeholder (for the Business Functions in the model or view) on the canvas;
  • Click 'Insert Visual Item' to insert a placeholder (for the Business Actors in the model or view) on the canvas;
  • Click 'Insert Visual Item' to insert a placeholder (for the Business Roles in the model or view) on the canvas;
  • Select the visual items, click edit, and configure them to draw the available actors, roles, and functions in a certain graph/pattern on the canvas.

Step 4. Viewer & Player: Generate and Publish the Visualization

dragon1 viewer

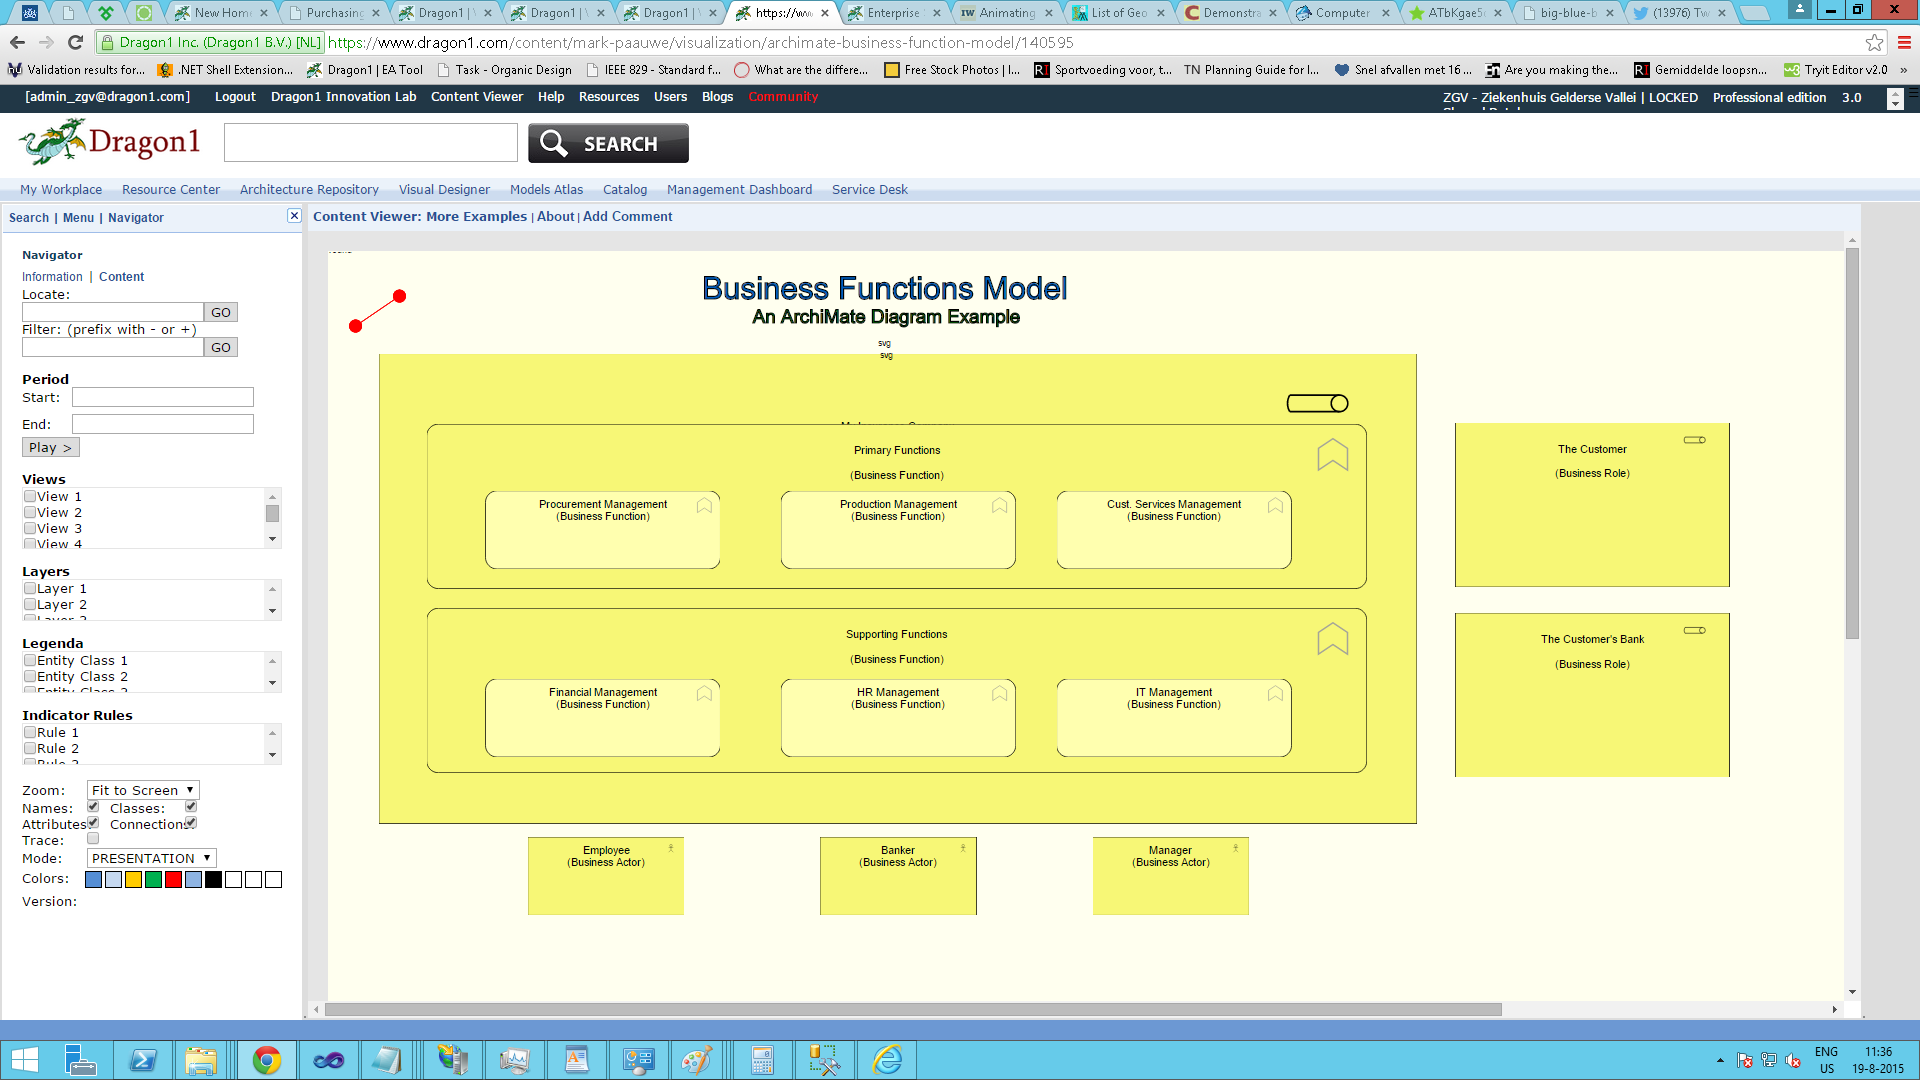
Screenshot of the ArchiMate Business Functions model in the Viewer.

You have created your ArchiMate diagram and it is time to it share with others. You have the option to publish your visualization publicly or privately in the Dragon1 Viewer.

Users can if they want and if you have enabled the option, leave comments on your visualization, for you to improve it.

Overview of tasks to publish a visualization in the Viewer

  • Select the visualization and click Edit;
  • Choose Publication Status: World Wide;
  • Now your visualization is available for search and preview in the Dragon1 Viewer.

Read also

If you are interested in more examples of tutorials and examples of ArchiMate you might also want to read:

Get Started

Do you want to create an Architecture Diagram yourself? These kinds of architecture products can be created with Dragon1 PRO. Purchase online your user license today.

Also you can view your own ArchiMate files in de Viewer of Dragon1.