Create a Relationship
Note: the video is without sound or narration
Five ways to create Relationships
In this topic, you learn multiple ways to create Relationships between Entities and Entity Classes:
- Data Dashboard
The preferred way to add relationships. In this topic, two methods are demonstrated. - Architecture Repository
By manually creating the relationship. - Visual Designer
By drawing a relationship and editing a relationship and its attributes. - Import
By importing a JSON, XML, Excel, or CSV file containing the relationship information .
To create a model or a meta-model, you must create a relationship between entities. On Dragon1, relationships are stored in the Repository as separate, manageable, and reusable objects.
Data Dashboard #1: Quick and Easy
In order to create a relationship between data items on Dragon1 the easy way, do the following:
- Log in.
- Go to the Data Dashboard.
- Click on a Data Item in the Data Dashboard.
A screen with the Data List (list of Data Items) will open. - Click on an Entity in the Data List.
- At the screen's top, click the 'Add Relationship' button.
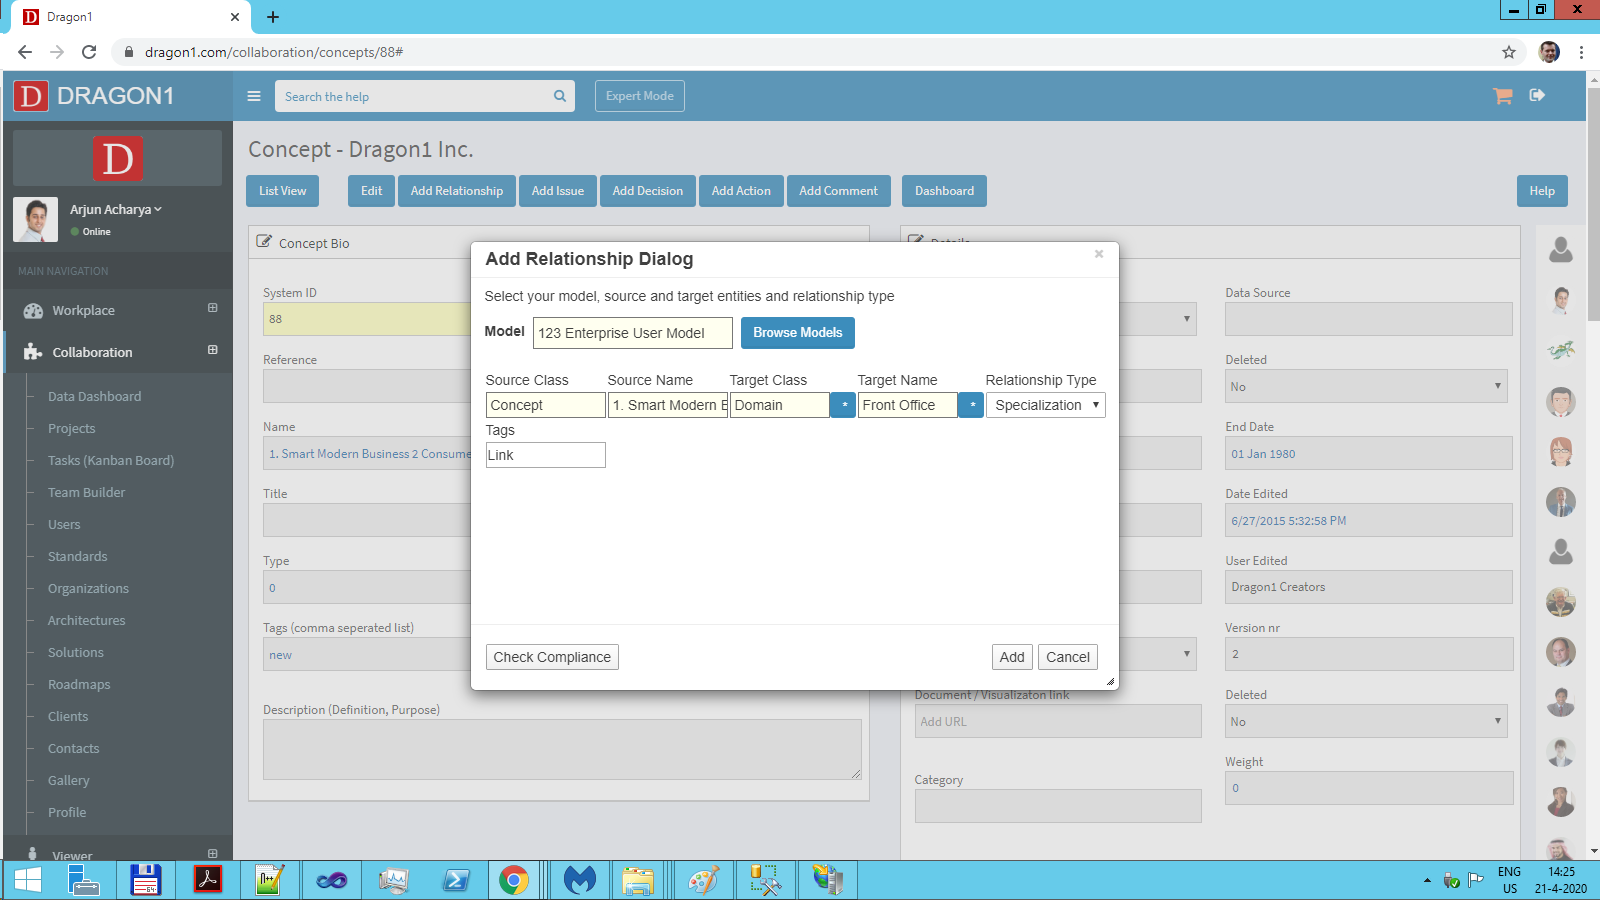
- An Add Relationship Dialog appears, in which a new relationship can be created.
- Select a Model using the 'Browse Models' button.
- Select the Source Class and Source Name.
- Select the Target Class and Target Name.
- Click on the "Add" button.
- Refresh the page you are on.
- Click on the "View Model" button.
- Now you can see the model, including the newly created Relationship.
- A next step would be to link the model to a Visualization.
Data Dashboard #2: More structured
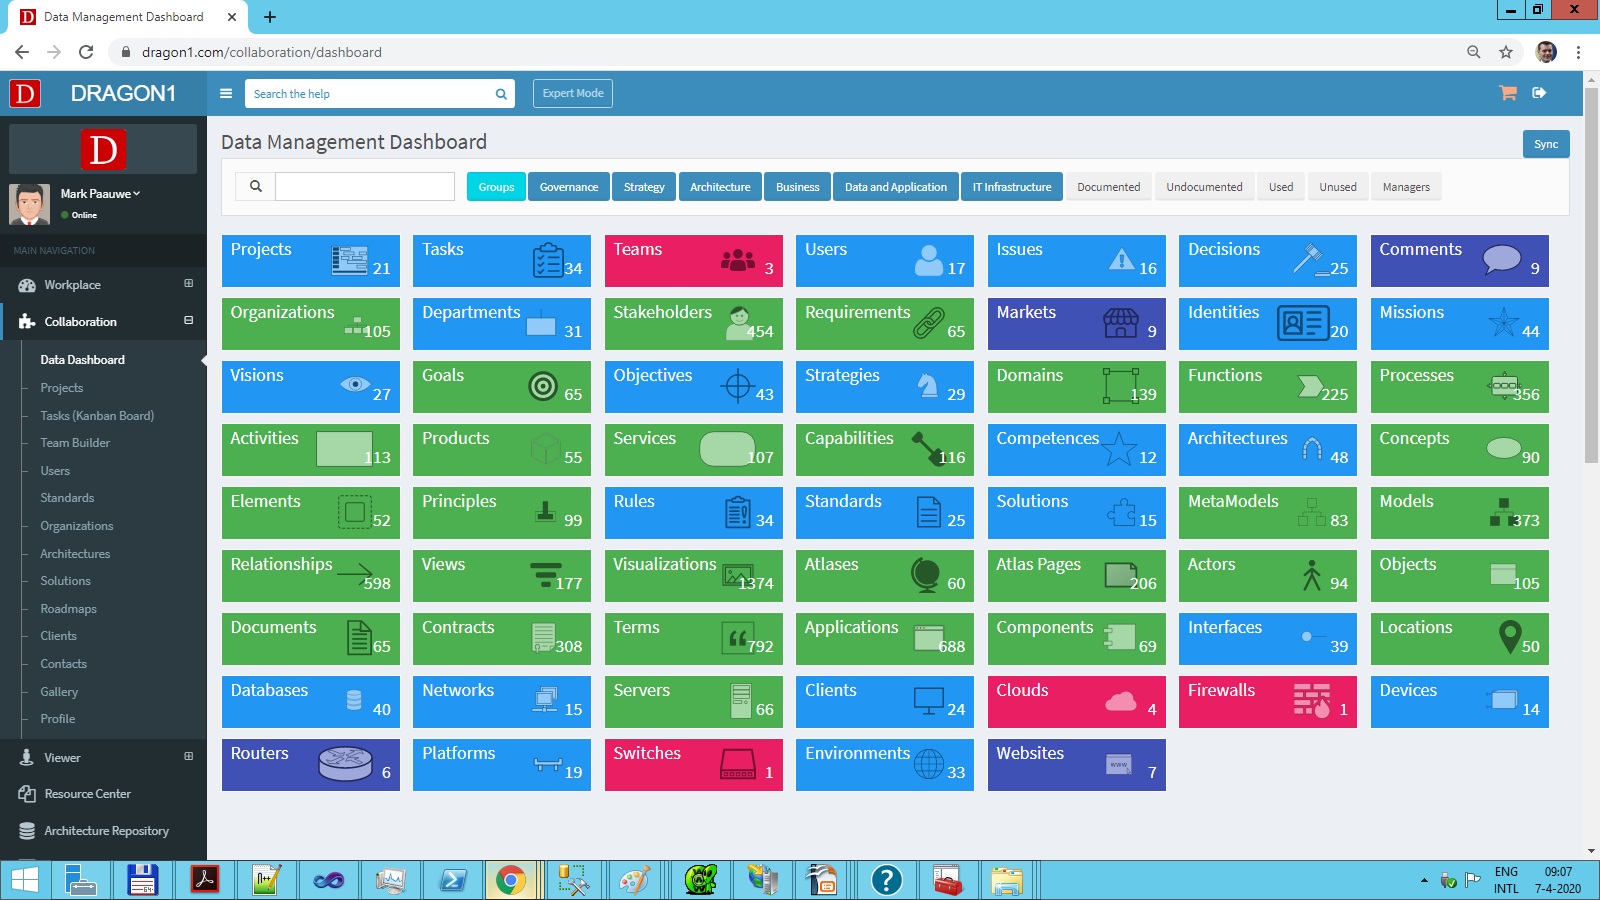
The Data Dashboard is an overview of all repository objects on Dragon1 presented as tiles. Per tile, a counter is shown in which the number of objects is presented. Once the number of objects per tile rises, the color of the tile will change.
A Relationship can be created via the Data Dashboard by following the steps below:
- Log in.
- Click 'Collaboration' on the left side menu.
The Collaboration menu opens, showing the 'Data Dashboard' menu option. - Click the 'Data Dashboard' menu option.
- Inside the Data Dashboard, locate the tile 'Relationships'.
- Click the 'Relationships' tile.
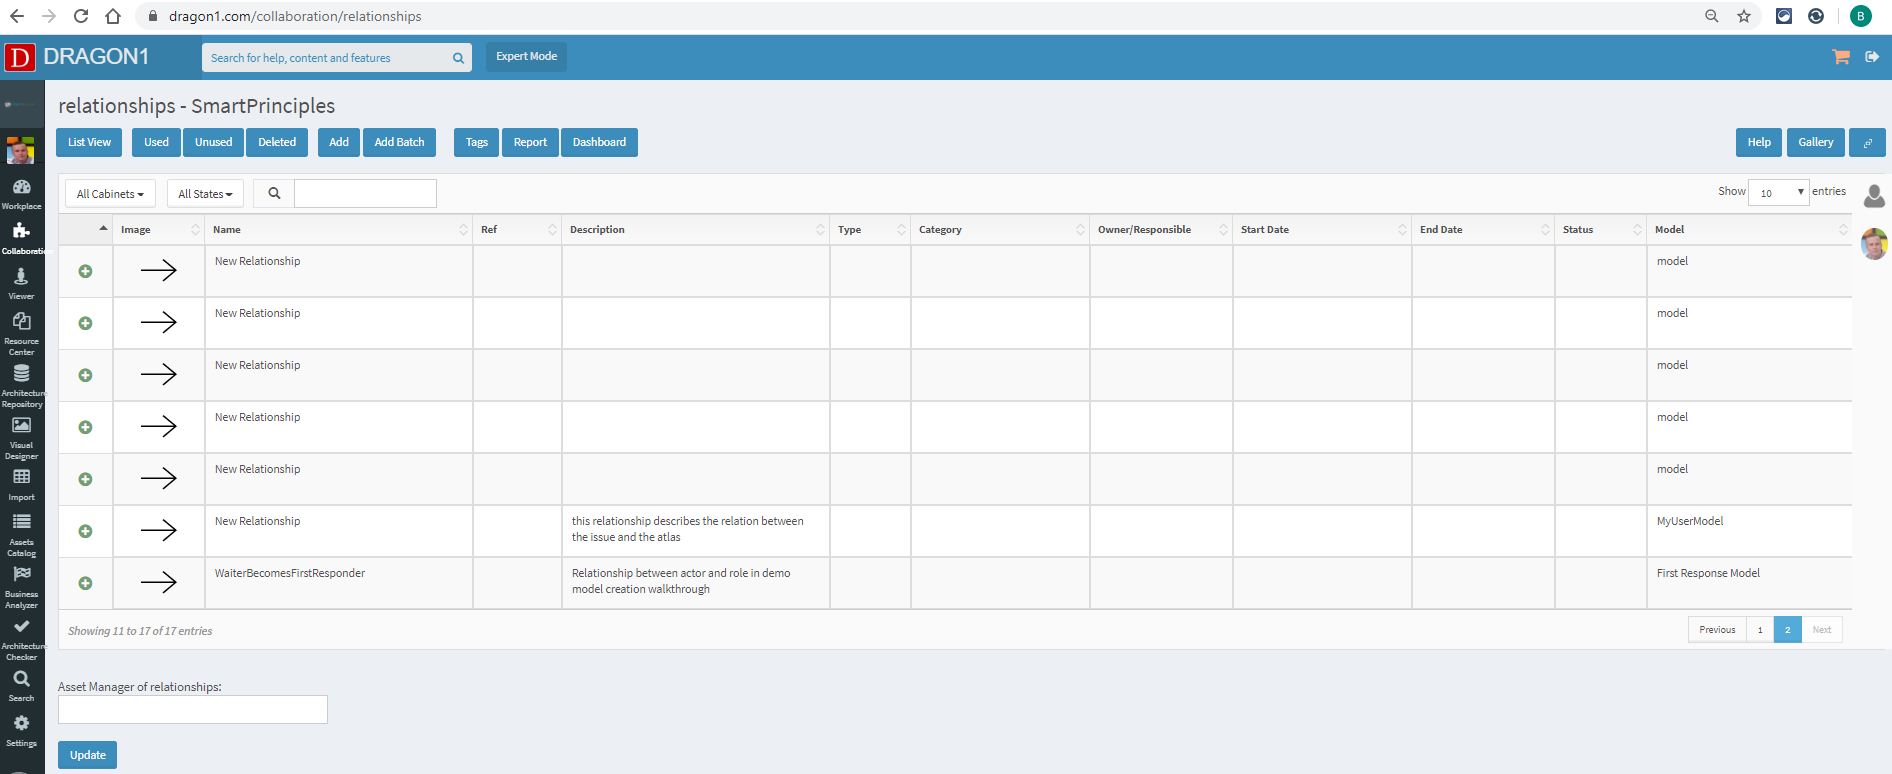
A list with all defined Relationships shows up. Per relationship record, detailed information is shown (such as description, in which model it is used, etc.). You can navigate between pages at the bottom right of the screen using the page navigation buttons.
- Press the 'Add' button for a new relationship.
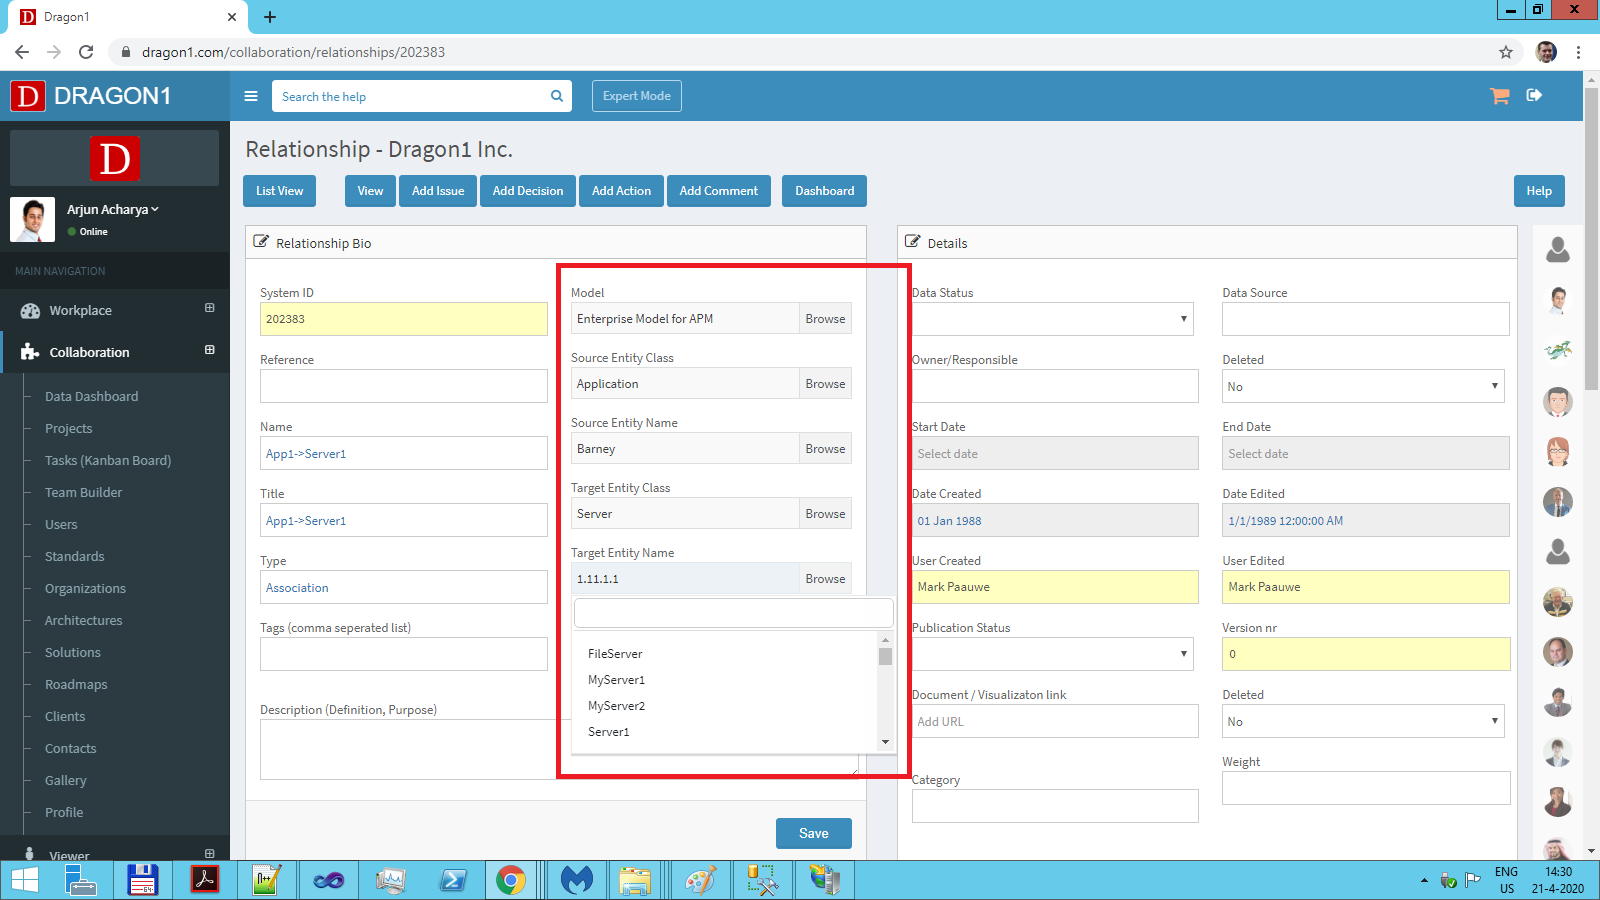
- A screen shows where the Relationship can be defined.
Pay special attention to the fields in the red rectangle. These fields will determine which model of the relationship will appear and what entity classes should be related to each other (source and target).
Per source/target pair, Entity Type (e.g., Application) and the name of the Entity Class (e.g., Barney) must be defined. By clicking the 'Browse' button behind the input fields, a drop-down list will appear where the available types and names can be located. A quick look-up can be done using the search box at the top of the dropdown. - Click the 'Save' button.
The Relationship will be created and appears inside the list with Relationships.
Predefined types of Relationships
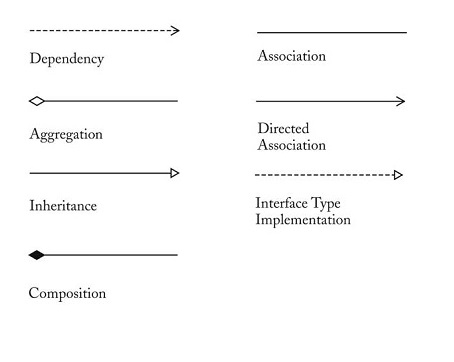
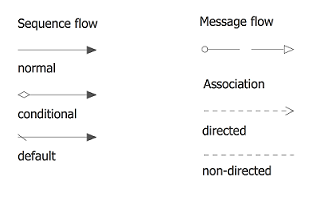
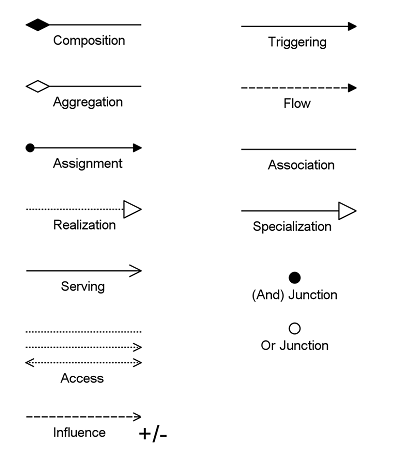
The Dragon1 platform predefines UML relationships, BPMN relationships, and Dragon1 method relationships, allowing you to work with the types you are familiar with:
UML relationships
BPMN relationships
Dragon1 relationships
Create Relationship in the Architecture Repository
A Relationship can be created manually in the Architecture Repository by following the steps below:
- Log in.
- Click 'Architecture Repository' on the left side menu.
- Enter two entities: an Application and a Process.
- Create a folder called 'Relationships'
- Select the new folder.
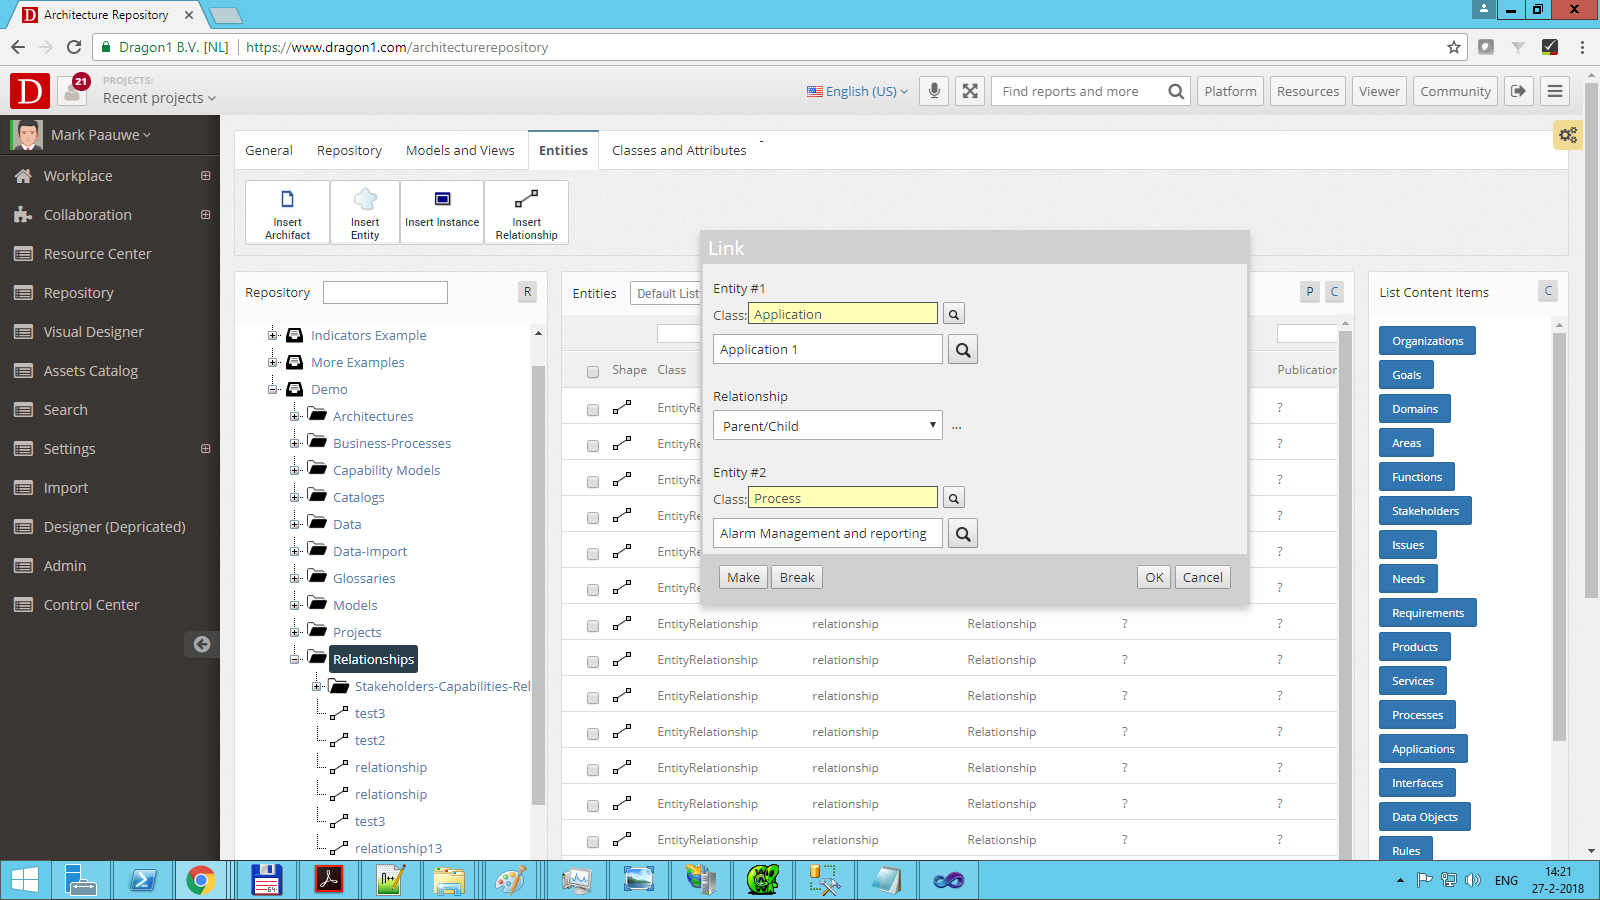
- Choose from the 'Entities menu' the menu item 'Insert Relationship'.
A dialog appears in which the relationship can be created. - Select as Source Class 'Application', and as Source Name, choose the Application class name created earlier.
- Select as Target Class 'Process', and as Target Name choose the name of the Process class created earlier.
- Select a Relationship type, e.g., 'Parent/Child'.
- Click on the 'Make' button.
The Relationship will be created and appears in the Explorer Tree View inside the folder 'Relationships'.
Create Relationship in the Visual Designer
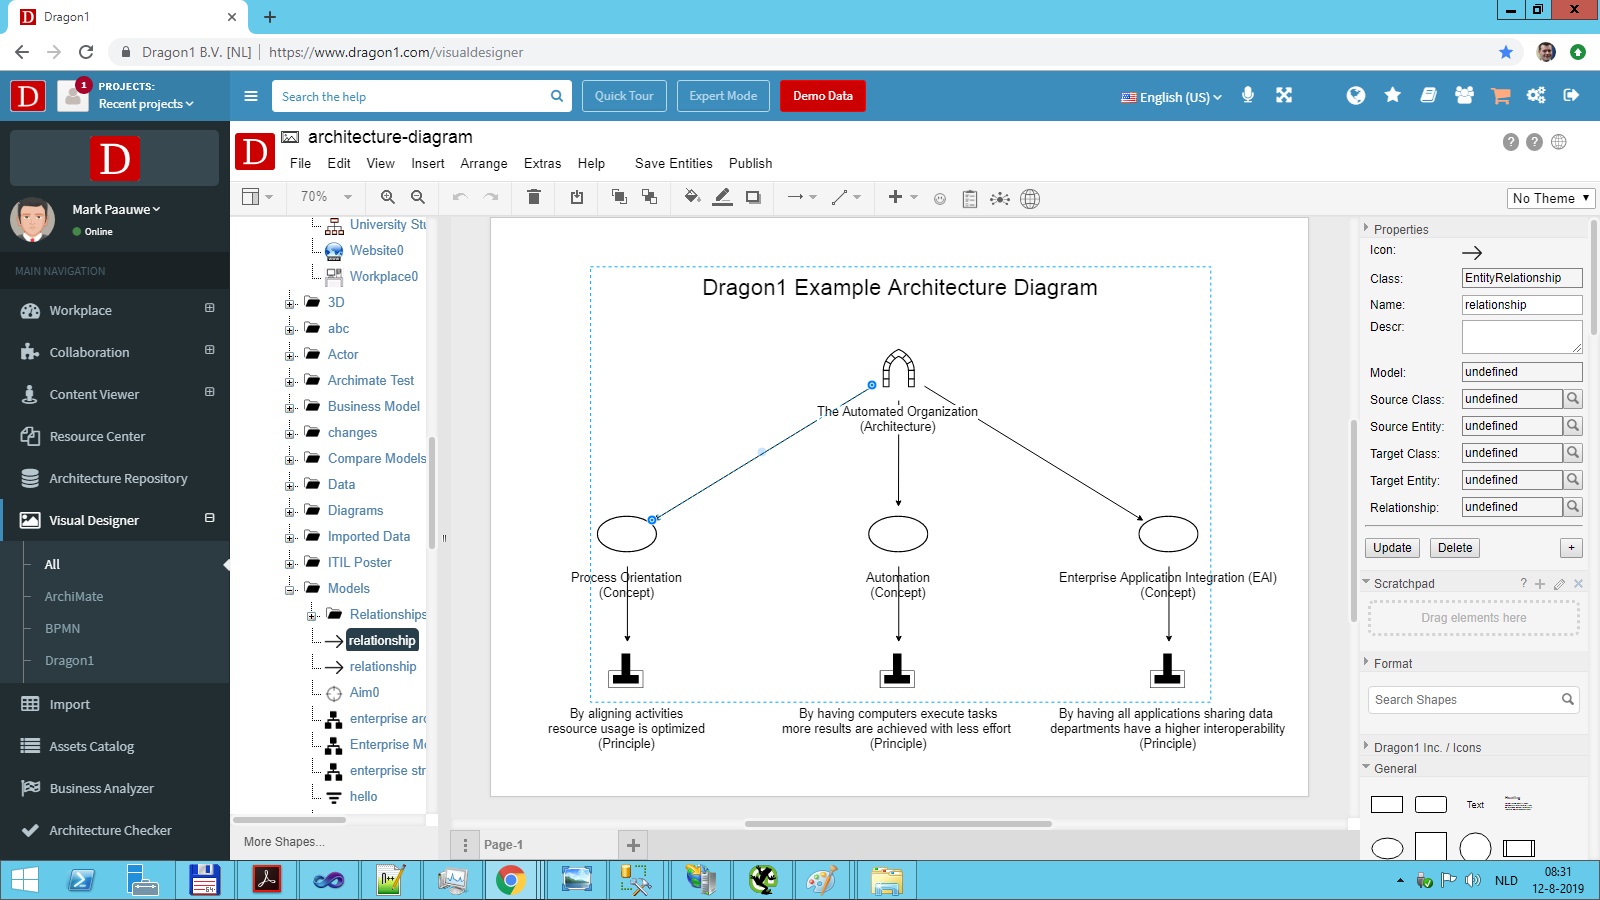
Creating a Relationship inside the Visual Designer is much more intuitive than creating a Relationship inside the Architecture Repository. It is as easy as drawing a line between entities.
- Log in.
- Click 'Visual Designer' in the left menu.
The Visual Designer will open. - Select a Folder.
- Create or select a Model or Visualization in the folder.
- Drag two entities onto the canvas.
- Draw a relationship between the entities.
- The Relationship appears as a data object in the tree view at the left.
- After selecting the Relationship in the tree view, its attributes can be edited in the property pane on the right side of the screen.
Create Relationship via Importing a File
The Dragon1 import application supports importing Excel sheets (saved as CSV files) containing relationship data.
To import an Excel Sheet with relationship data:
Create an Excel Sheet with the following columns:
- relationshipid
- sourceentityid
- targetentityid
- relationshiptype
- relationshiptext
- Fill the Excel Sheet with the Ids, type, and text information.
- Save the Excel Sheet as a CSV file.
- Go to the Dragon1 website and log in.
- Click 'Import' in the left sidebar. The Import web application will open.
- Select your computer's local CSV file (containing the Excel Sheet).
- Select a Cabinet, Dossier, and Folder as the location for the import.
- Click on the 'Import' button. The data will be imported.
- Click on Architecture Repository in the left side menu. This will open up the Architecture Repository.
- Open the Cabinet, Dossier, and Folder in which the data was imported.
- The imported relationships will appear in the Explorer Tree View.


